Learn · Bring your own AI · 4 min read
Bring your own AI
Wodo speaks MCP, the open protocol AI tools use to work with other software. Open means exactly that: you bring the AI your company has approved, whatever it is — Mistral's Vibe, a locally operated model on your own hardware, Claude, or any other MCP-capable assistant. We don't bundle an AI into Wodo, and we don't pick one for you. Your content, your choice of model — including the choice of none.
Connecting an assistant isn't an admin setting — any member can do it for themselves. It runs under your own account, which shapes everything below.
Once connected (and only with your explicit authorization), an assistant can search and read items and documents, create and update them, add comments, and manage labels and milestones — acting as you, seeing only what you can see. The access is scoped and revocable at any time, and an organization whose content is read-only is read-only for assistants too.
One honest reminder: what an assistant does with the content it reads is governed by its operator, not by us. That's exactly why the company-approved model — or the local one — is the right default.
Connecting follows the same shape everywhere: point your assistant at Wodo's MCP endpoint — https://app.wodo.co/mcp — then sign in once to authorize it. Here's how that looks in the tools we've tested.
Mistral Vibe
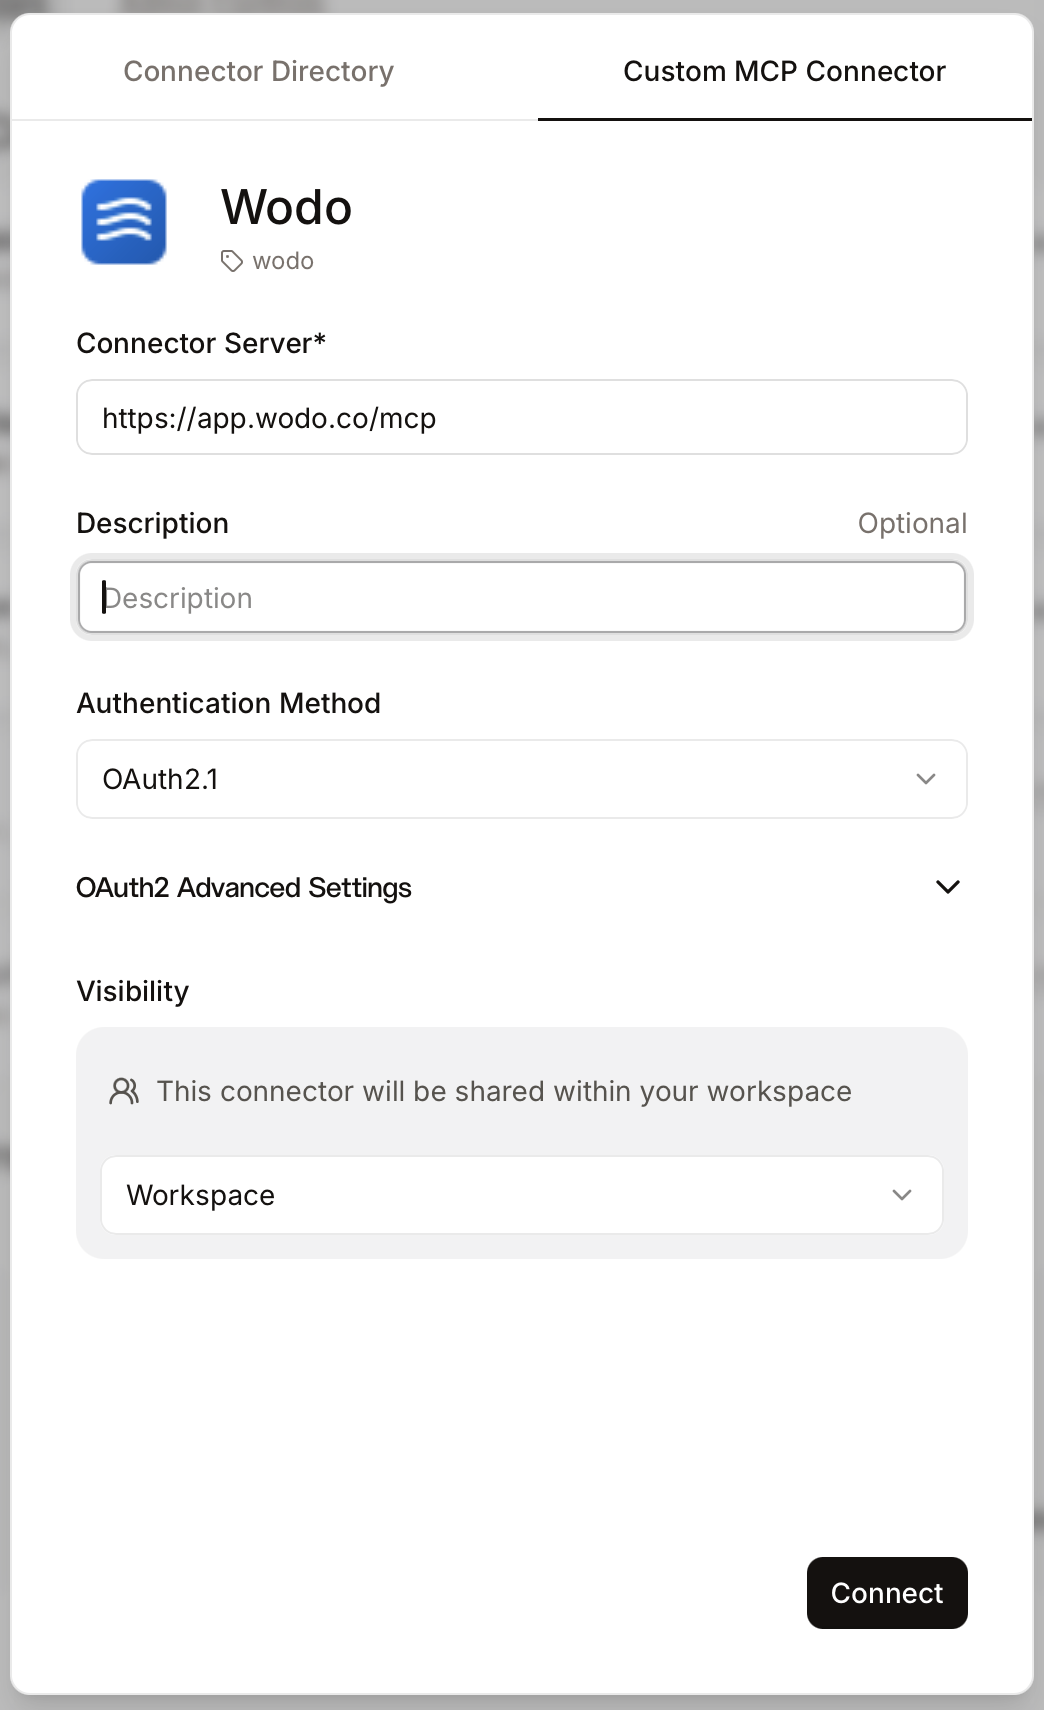
- Open Connectors, click + Add Connector, and choose the Custom MCP Connector tab.
- Give it a title — for example "Wodo" — and set the Connector Server address to
https://app.wodo.co/mcp. - Choose the Visibility that suits you — just you, or shared with your workspace.
- The Create button changes to Connect — click it and authorize on the Wodo sign-in page.
LM Studio (local model)
Running a model on your own hardware? LM Studio connects through its MCP config — the same endpoint, no cloud in between.
The quick way — click to open LM Studio with the server filled in (needs LM Studio 0.3.17 or newer):
Or add it yourself — edit mcp.json and include Wodo:
{
  "mcpServers": {
    "wodo": {
      "url": "https://app.wodo.co/mcp"
    }
  }
}
Save, and LM Studio confirms "wodo" has been added (the button does the same) — click Configure. Then, in a chat, open the plugins menu and switch mcp/wodo on: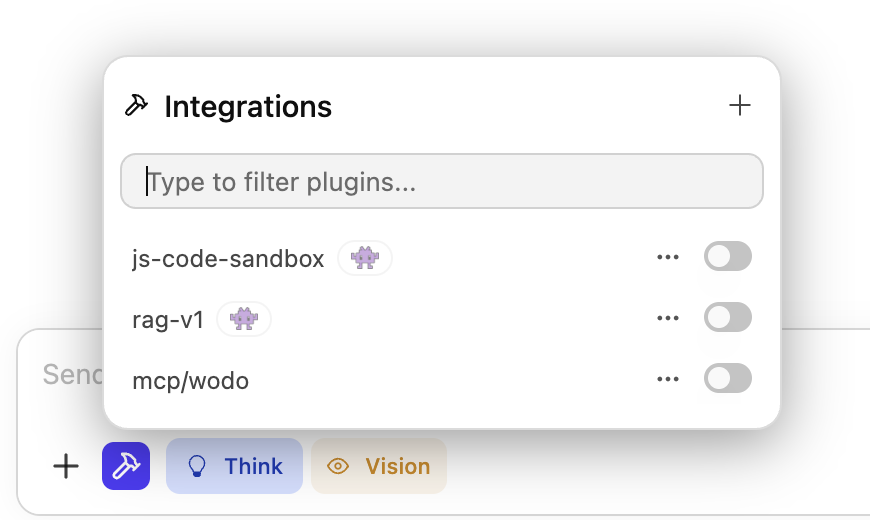
The first time you enable it, LM Studio detects it needs to authenticate and opens the Wodo sign-in page. Come back and it confirms Wodo MCP is now ready to use — your local model can use it in chats.
Claude Desktop
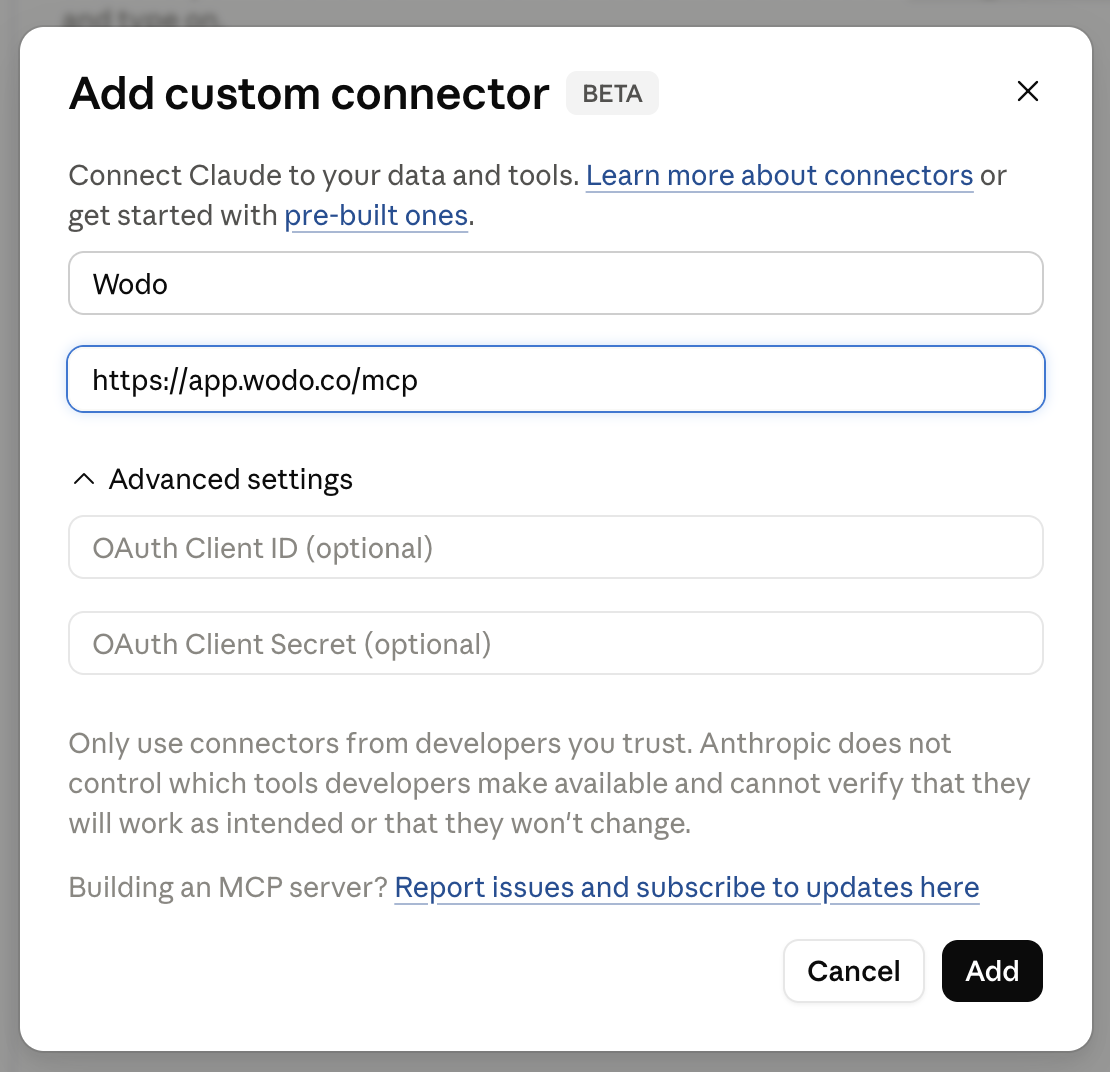
- In Customize → Connectors, click + and choose Add custom connector.
- Name it — for example "Wodo" — set the URL to
https://app.wodo.co/mcp, and click Add. - Claude shows You are not connected to Wodo yet — click Connect and authorize on the Wodo sign-in page.
Claude Code
No dialog — just two commands:
- Add the server from your terminal:
claude mcp add --transport http wodo https://app.wodo.co/mcp. - Run
/mcp, select wodo, then Authenticate — Claude opens the Wodo sign-in page.